
How to install a VPN on Windows without an app
A VPN is a connection that allows you to surf the open waters of the internet with full security and anonymity. In this article we will go through the steps on how to manually install a VPN connection on your Windows 10 computer.
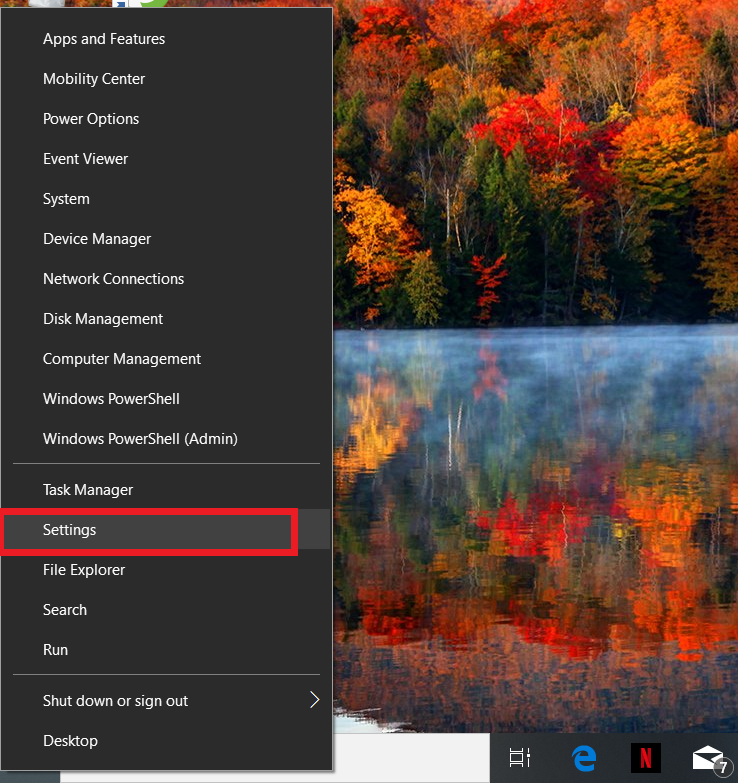
- Right click on the start button and select “Settings”
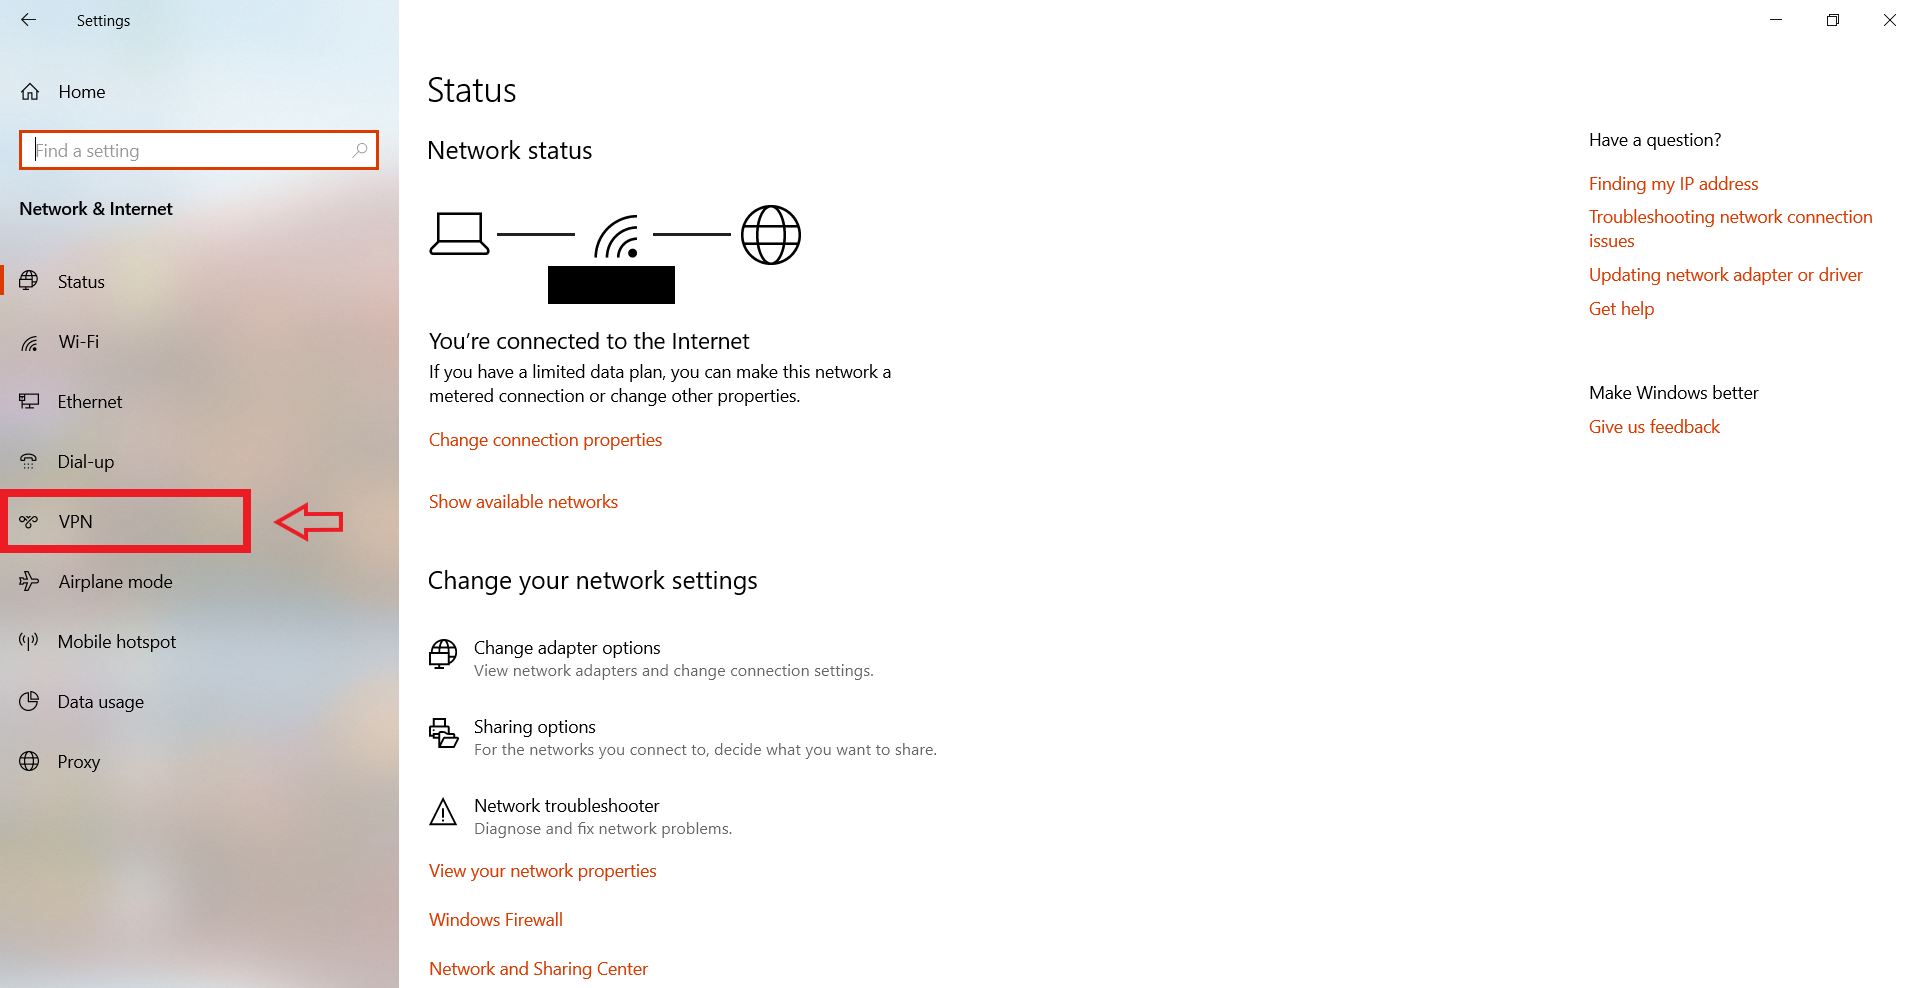
- Click “Network and Internet”

- Select “VPN” from the menu on the left
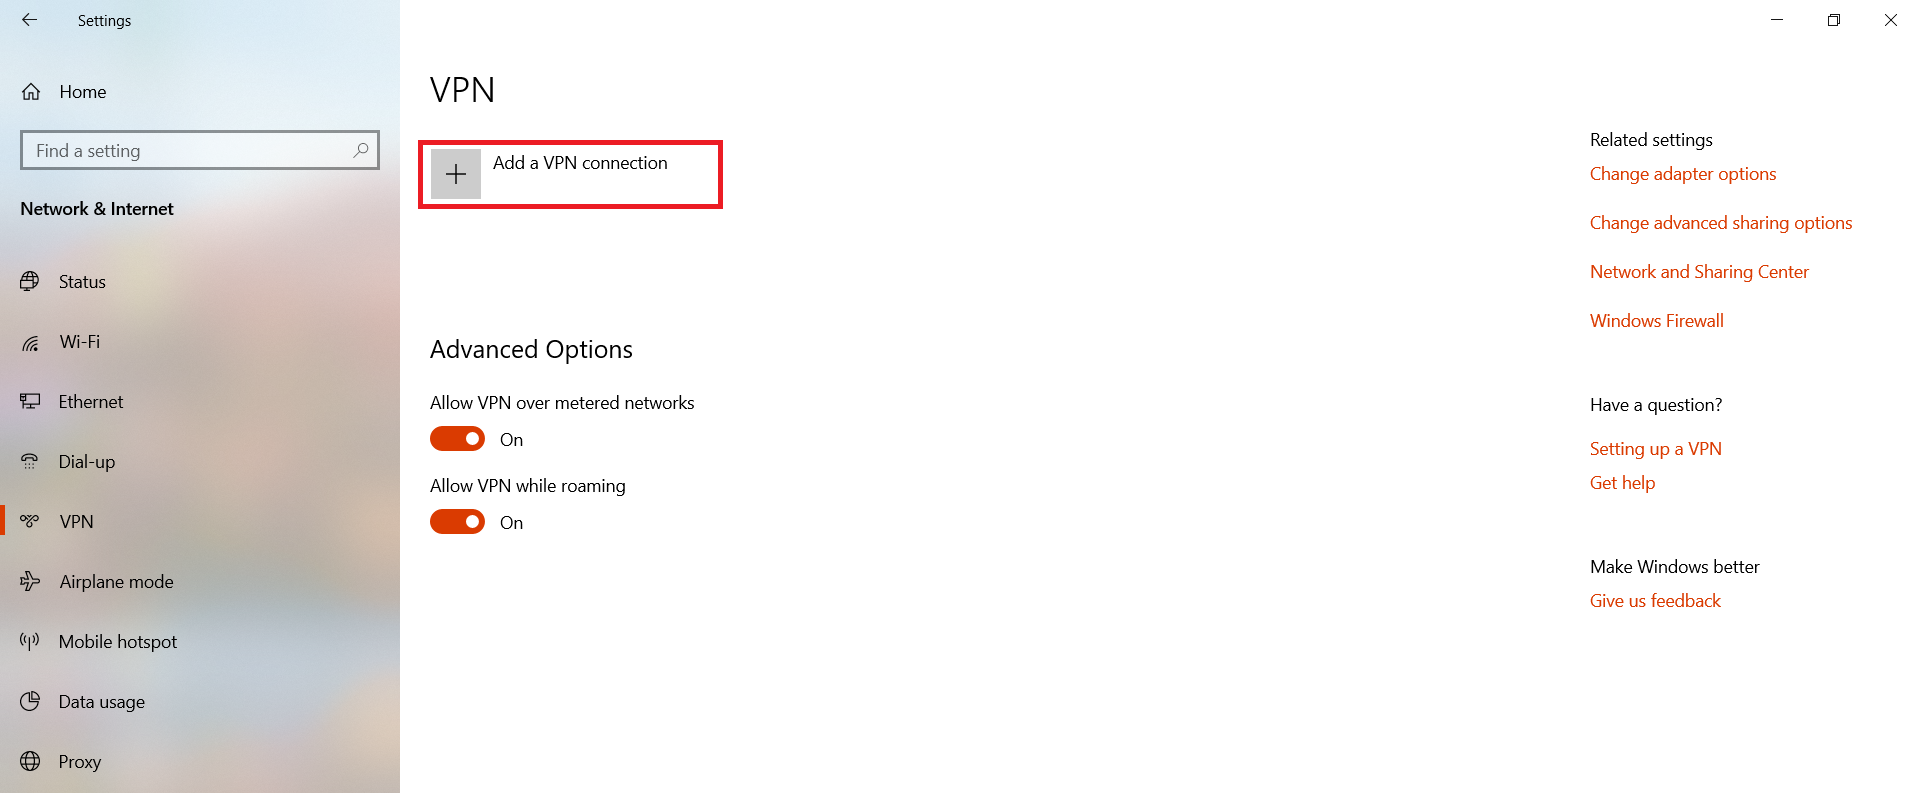
- Click “Add a VPN connection”
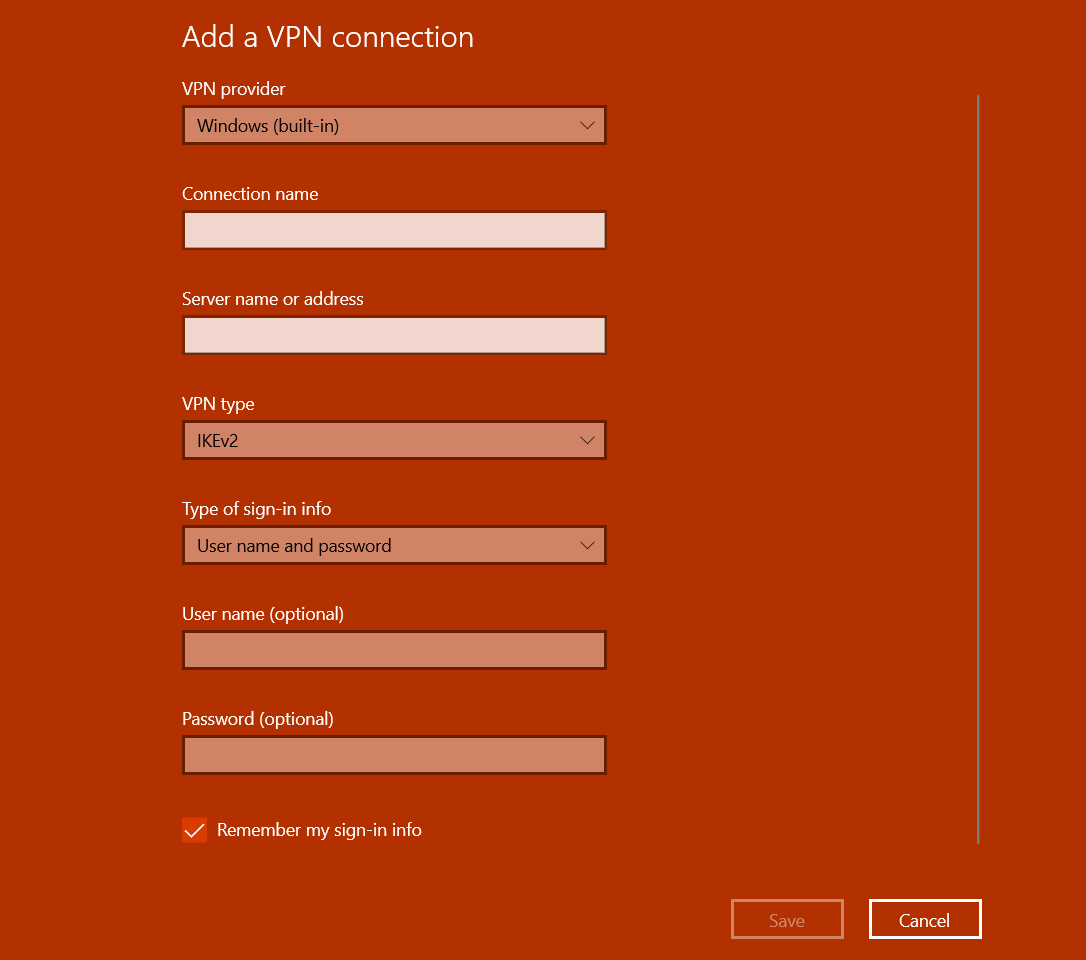
- On the appeared fill in as follows. Under ‘VPN provider’, select “Windows (built-in)”
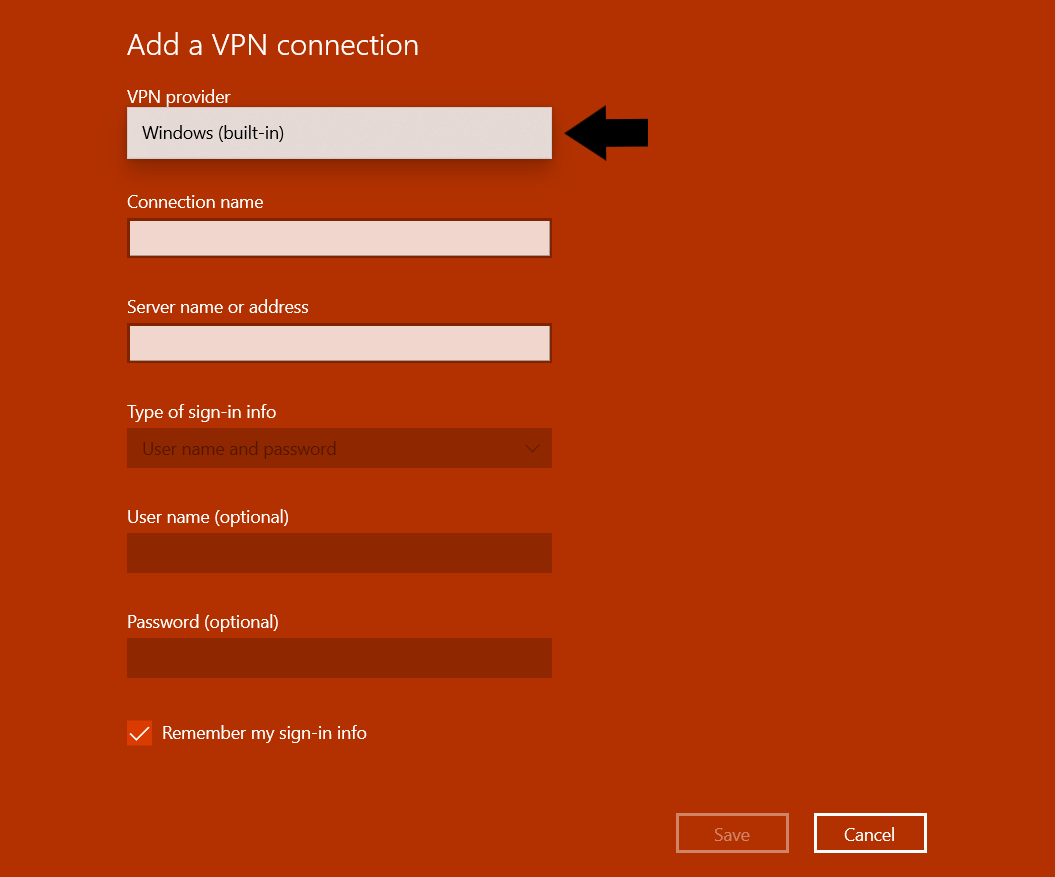
- Fill in the ‘Connection name’ with what you want your VPN to be called. Under ‘Server name or address’ you should put the data given by your VPN provider.
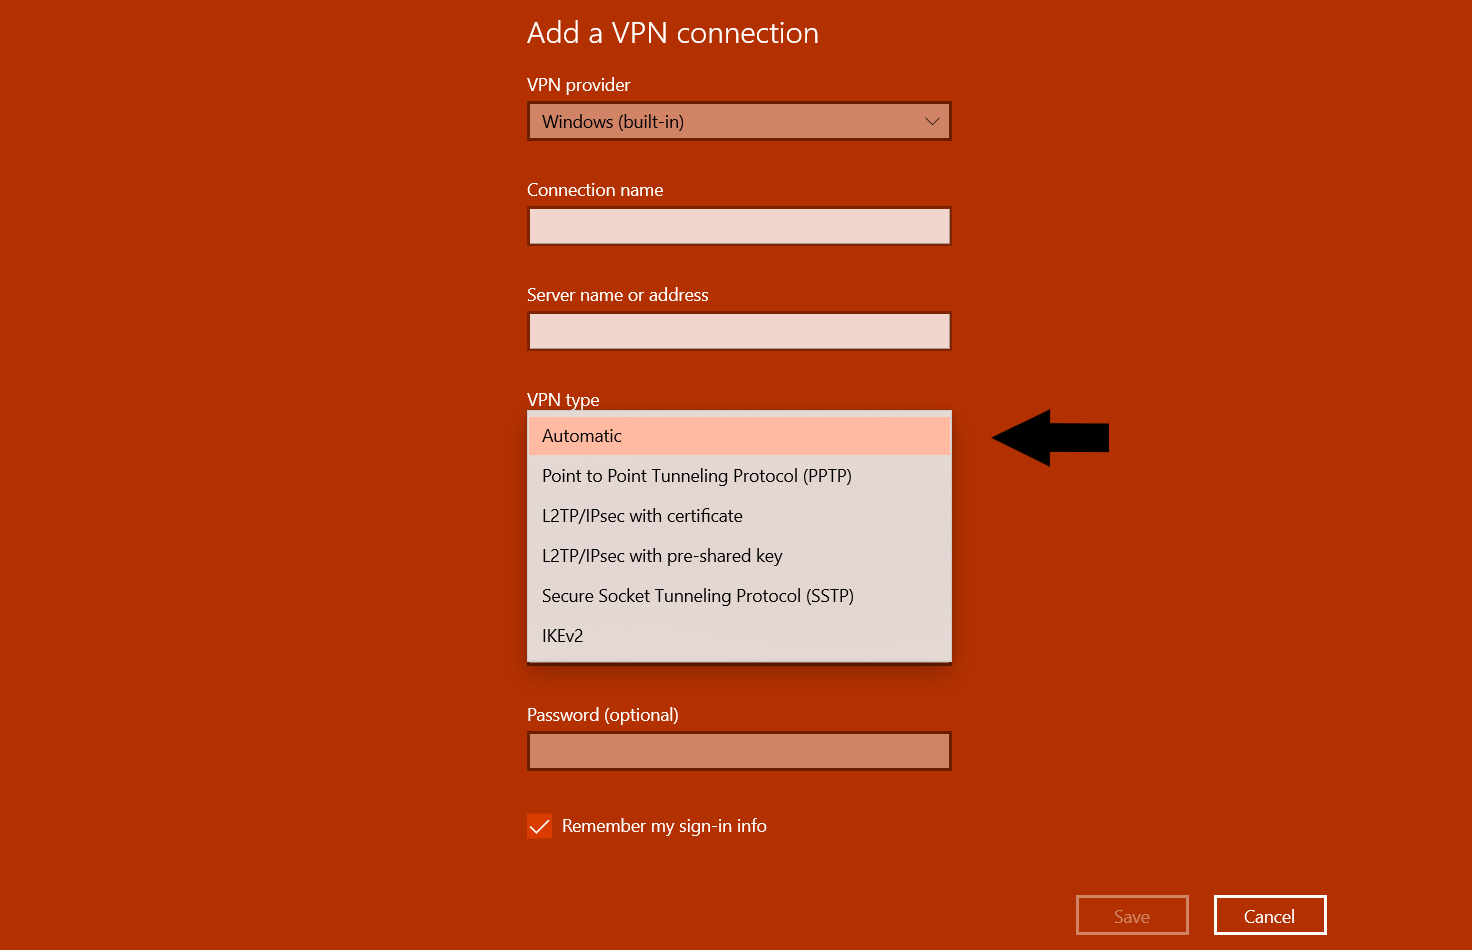
- Under ‘VPN type’, select the type of VPN connection you want to make from the drop down list. (This information will be given by your VPN service provider)
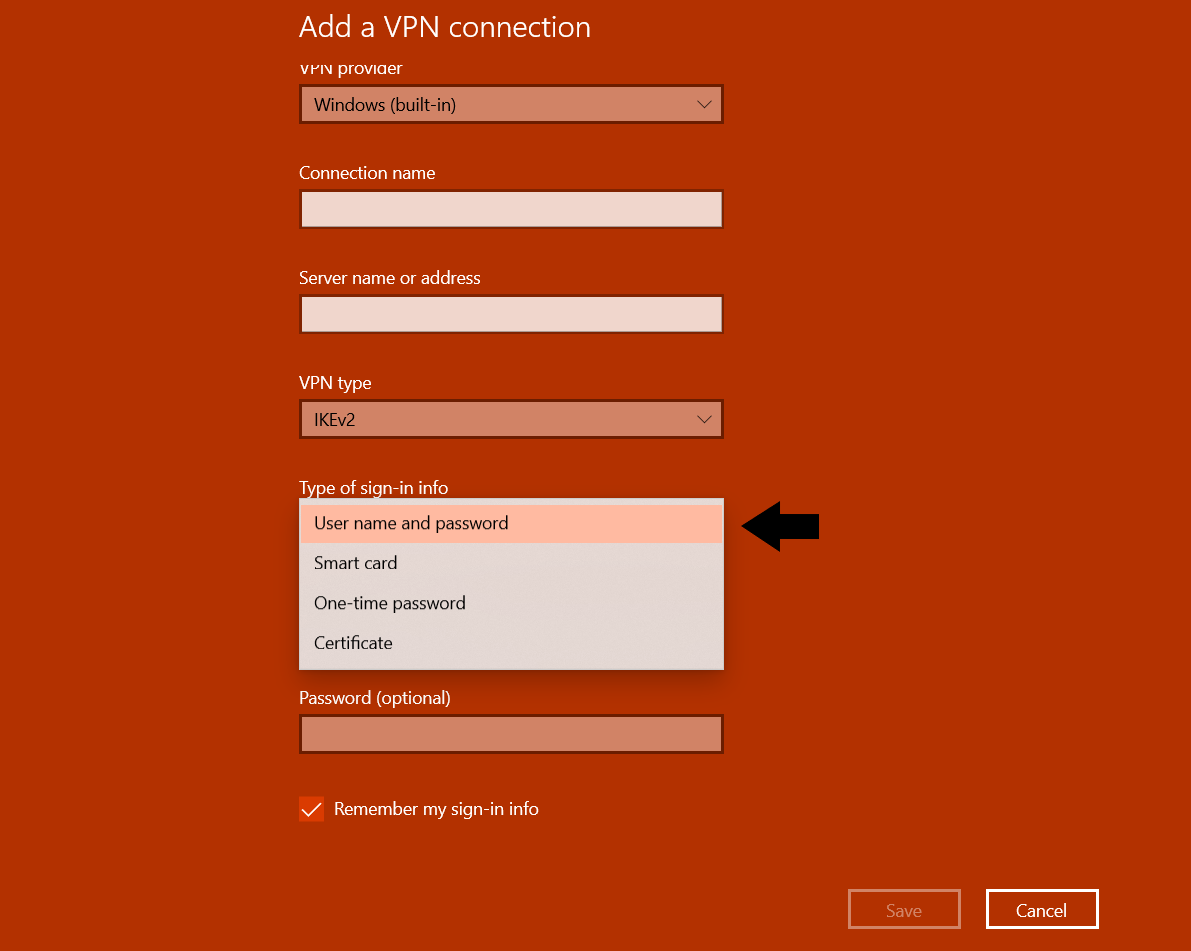
- Next up is ‘Type of sign-in info’ where you have to select an option from the drop-down list. (This will depend on your VPN provider)
- Fill in the details and click on Save.
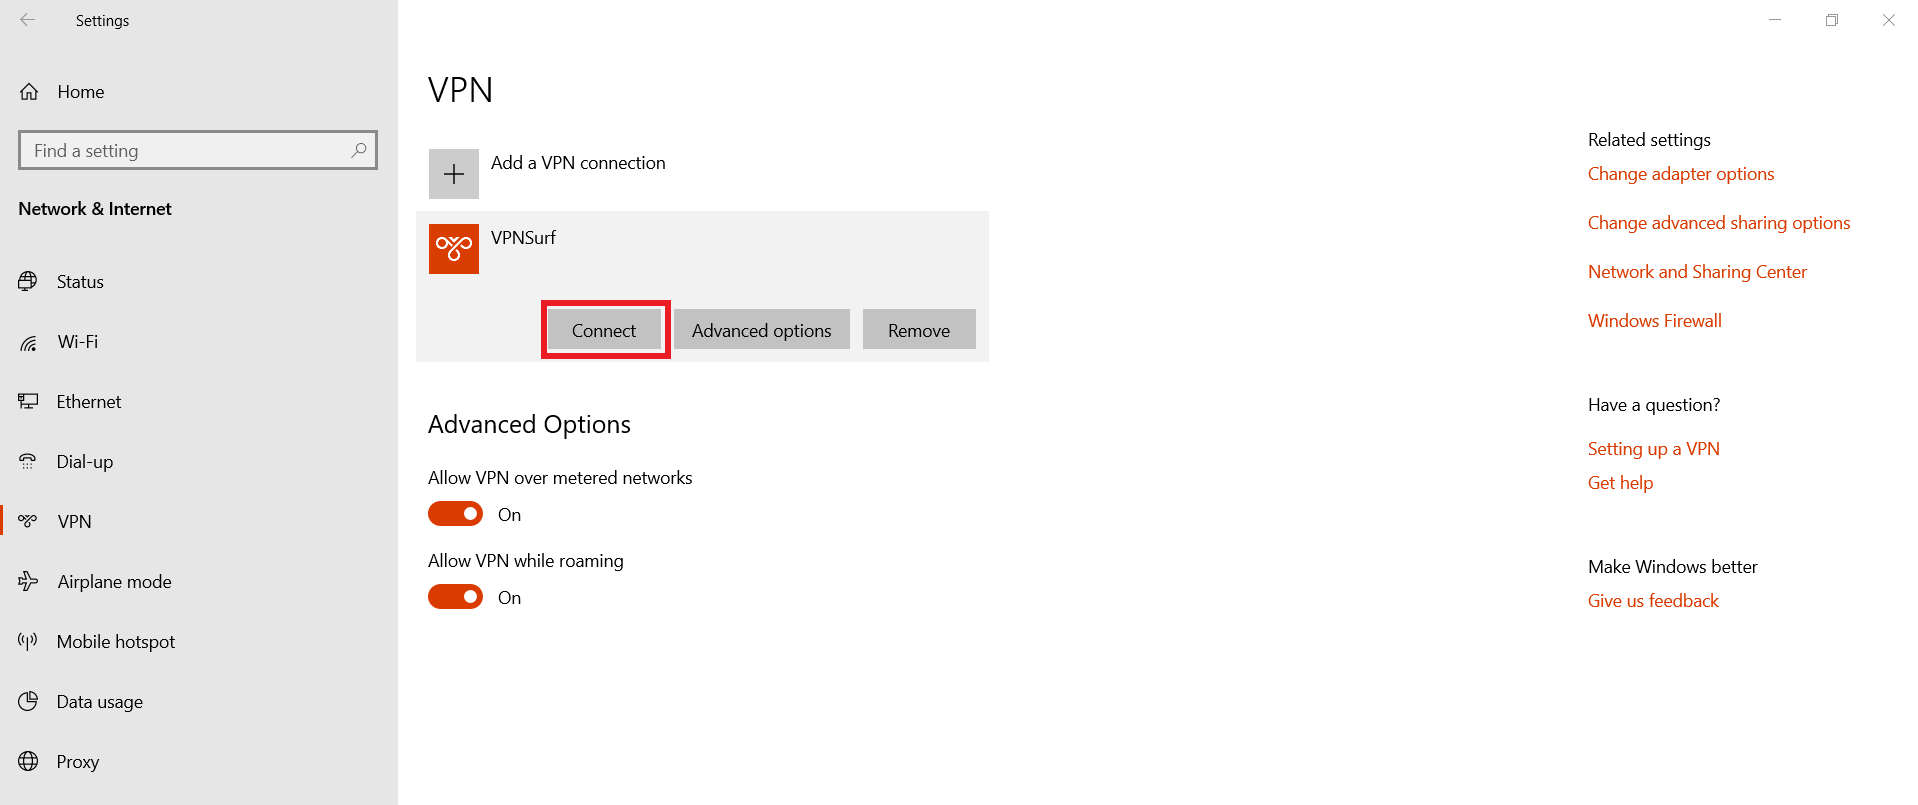
- Now you will see the newly created VPN.
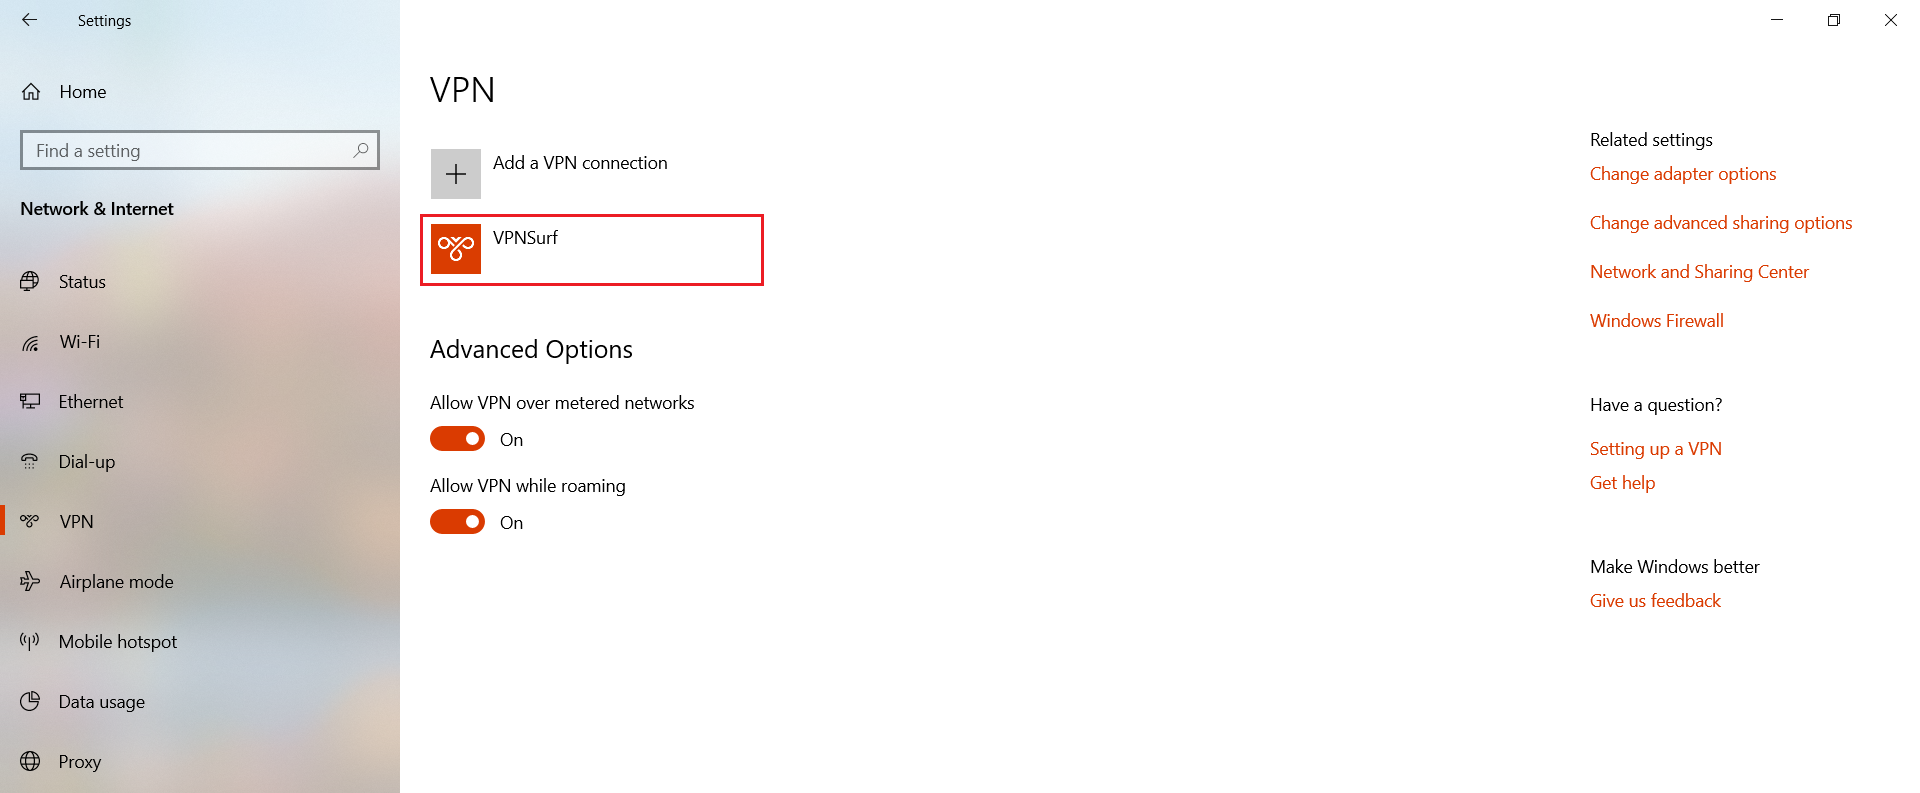
- Click on your VPN and simply click on connect to start using the internet in a much safer way.
Congratulations! Now you know how to setup your very own VPN connection.
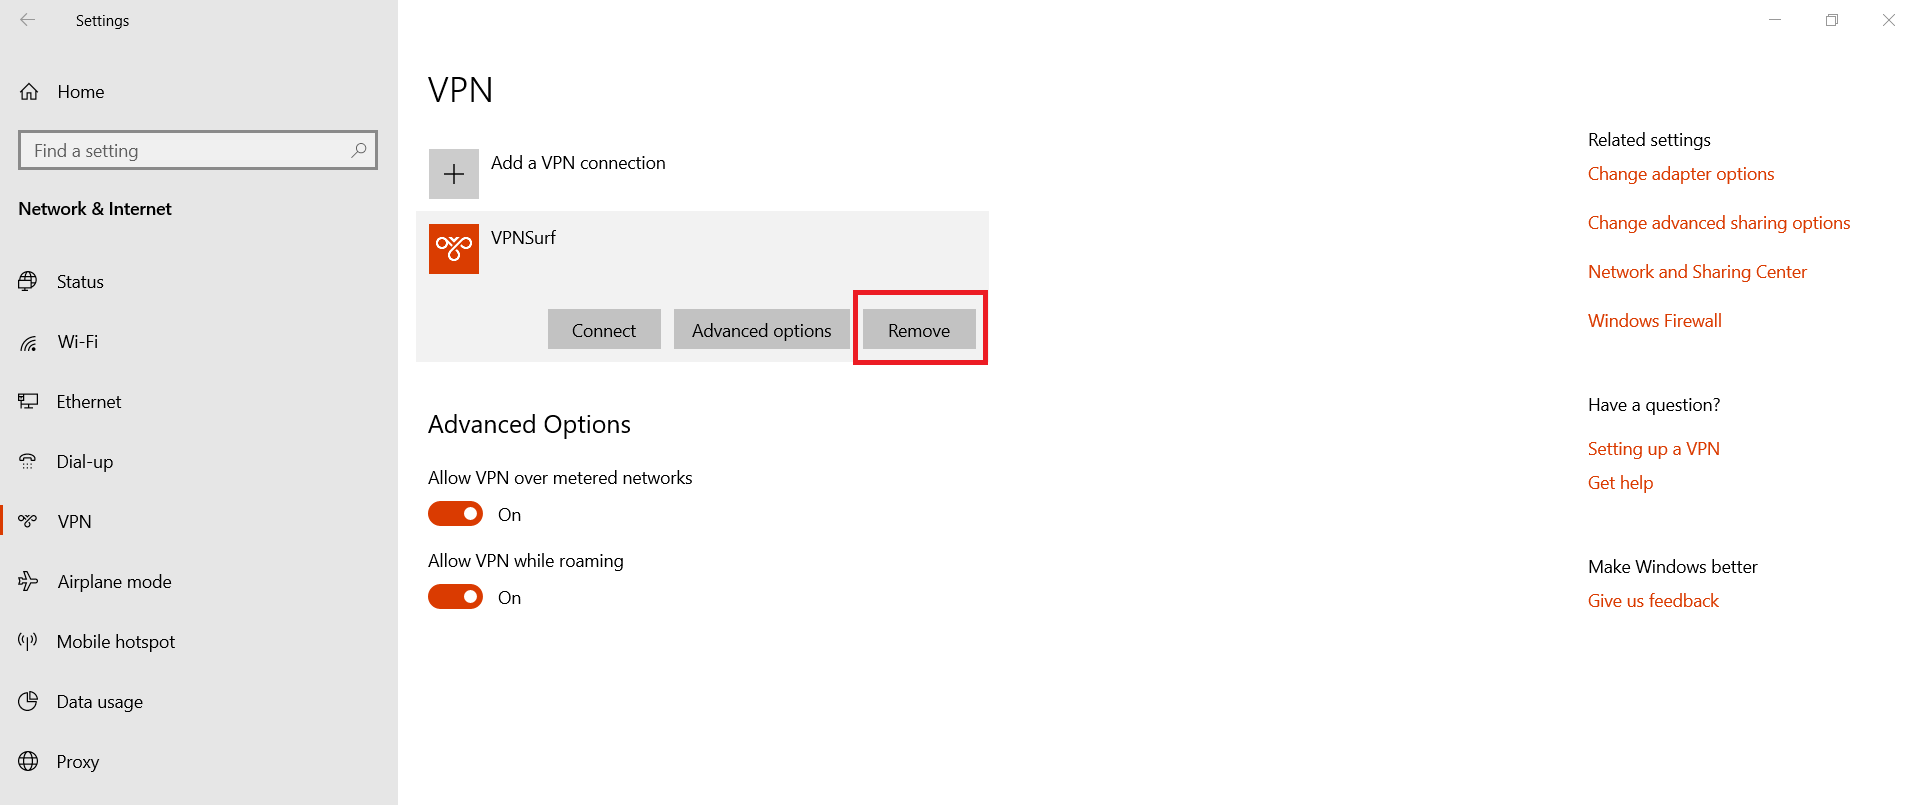
If you would want to remove your VPN connection, simply go to your VPN and click on remove.
Note that in order to set up a VPN connection, you should have a subscription from a VPN provider. Haven’t got one yet? get it from us, the best VPN which allows you to surf anonymously and safely through the open waters of the internet.
Do you value your privacy online?
Use VPN Surf and surf safely and securely in the open waters of the internet.
2678