
Different operating systems offer various tools that allow the user to complete tasks more efficiently and provide a better experience for the individual. While these features and tools vary across the operating systems, there are many of them that share the same functionality. One such thing is the ability to take screenshots.
Screen captures are a great way to share with others what is happening on your screen, as well as save certain information for later in a graphical format. If you get some sort of an error, you can easily capture a screenshot and send it over to a tech support team. On the other hand, if you want to save a funny text from your friends, you can also take a screenshot and save it for a later date.
macOS is one of the most popular operating systems out there, only beaten by Windows. Screenshot tools for it have always been simple to use, however, are somewhat primitive. Knowing the right keyboard shortcuts allowed you to capture almost anything on your screen but first, you had to know how to do it.
Since the release of macOS Mojave, Apple added a built-in screenshot tool similar to the one you might find on Windows. It allows you to capture a screenshot with a simple click of a button and today we will show you how to use it.
How to Take a Screenshot on Mac?
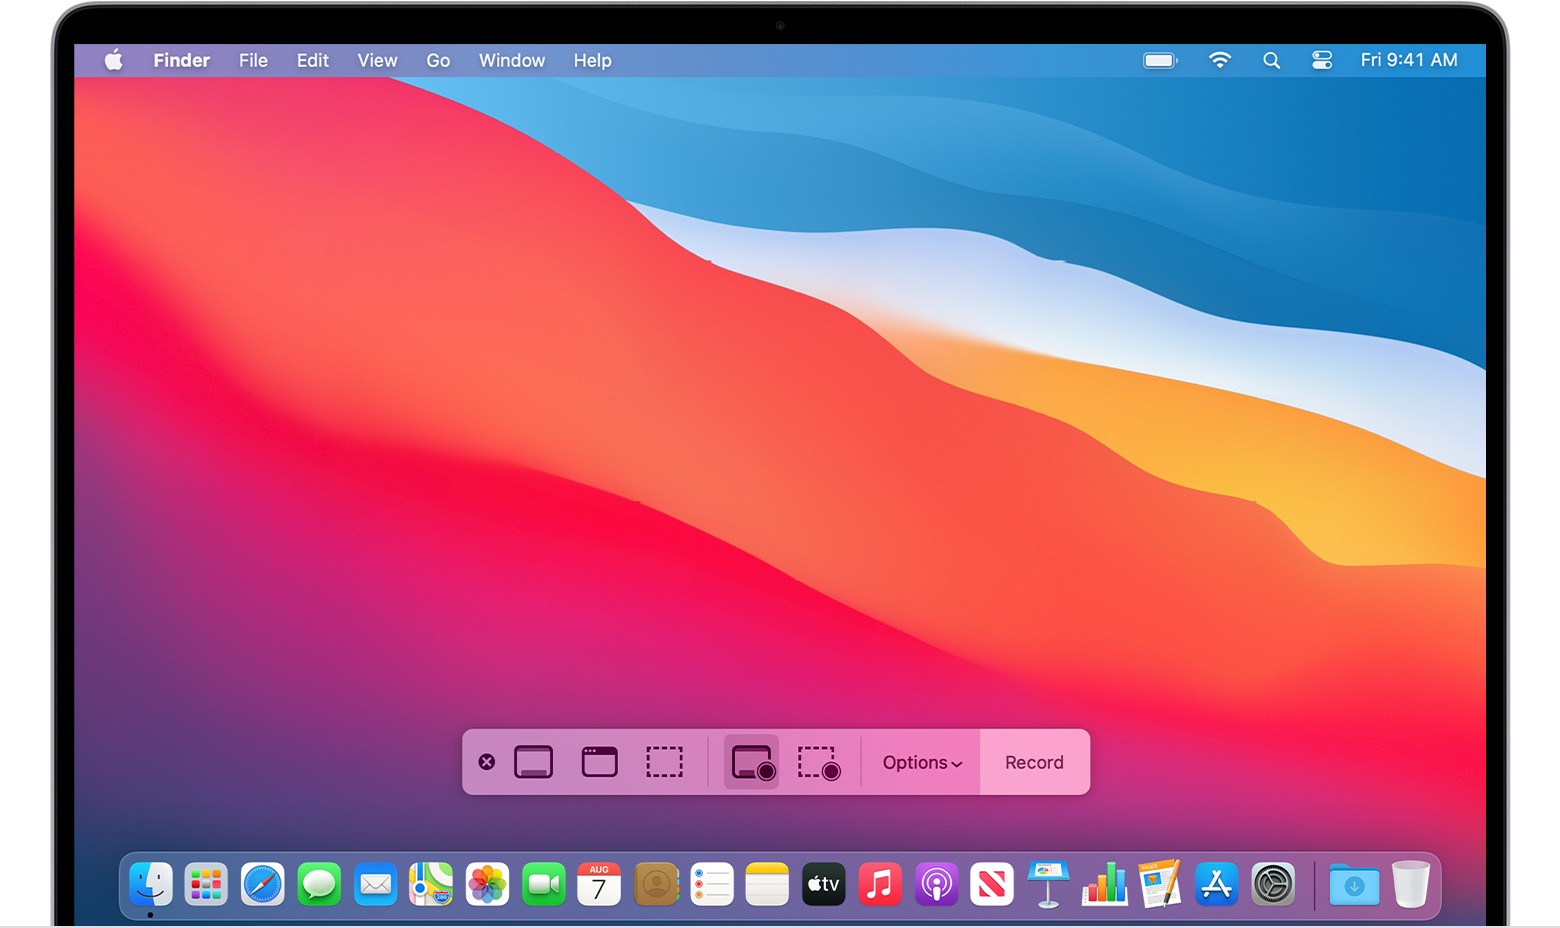
Image taken from support.apple.com
As it was mentioned above, there are multiple ways to capture a screenshot on macOS, simply pick one that suits your needs the most.
Screenshot Tool

Image taken from PCMag.com
To open the built-in screenshot tool, go to Launchpad, click on Others, and then on Screenshot. This can also be done by pressing the keyboard shortcut of Shift+Command+5. Using this tool, you can either take a screenshot of the entire screen, a custom section of a screen, or a selected window.
This tool also provides the feature of recording your screen, including the entire screen, or a selected portion of it. In the Options drop-down menu, you can also select the path where to save screenshots or even set up a timer.
Capture Entire Screen

Image taken from support.apple.com
Use the screenshot keyboard shortcut Shift+Command+3 to capture a screenshot of the entire screen. Once taken, in the corner of the screen, you will see a thumbnail. Click on this thumbnail to edit the image or wait until the screenshot saves on the desktop.
Capture a Portion of the Screen

Image taken from support.apple.com
Capturing a portion of the screen is as easy as clicking on Shift+Command+4 and dragging the crosshair to select the area of the screen you want to be captured. To move the selection simply hold the Space bar while dragging. Once the mouse or trackpad button is released, the screenshot of the selected area will be taken.
Capture a Window or Menu

Image taken from support.apple.com
Yet another convenient shortcut you could use to capture a certain window or menu is Shift+Command+4+Space bar. Once these keys are pressed simultaneously, your pointer will change into a camera icon. Navigate to the desired window and click on it to take a screenshot. To not include the window’s shadow in the image, press and hold the Option key while taking the screenshot.
Where to Find the Screenshots?
By default, screenshots are saved to the Desktop with the name “Screen Shot [date] at [time].png”. If you wish to change the default saving location, open the Screenshot app as mentioned at the beginning of the article, click on the Options menu and select the desired location.
Conclusion
This is how you take screenshots on Mac. We showed how to operate the built-in screenshot tools and what keyboard shortcuts to use for a more efficient process. If you have any questions or suggestions, please leave them in a comment down below.
Do you value your privacy online?
Use VPN Surf and surf safely and securely in the open waters of the internet.
361