
In this article we will go through the steps on how to manually create a VPN connection on your MacOS. Don’t worry, you don’t have to be tech savvy to set it up, it’s fairly simple.
First of all you will need to purchase a VPN connection (or get a free version) and with the purchase you will get some information relating to the VPN. This includes but not limited to information like the server address, your user credentials and the type of VPN connection. Once we have these steps we can proceed to creating the VPN connection.
Create a VPN connection in MacOS
Note that this article is specially focused on setting up VPN Surf services.
- Go to Apple Menu > System Preferences > Network

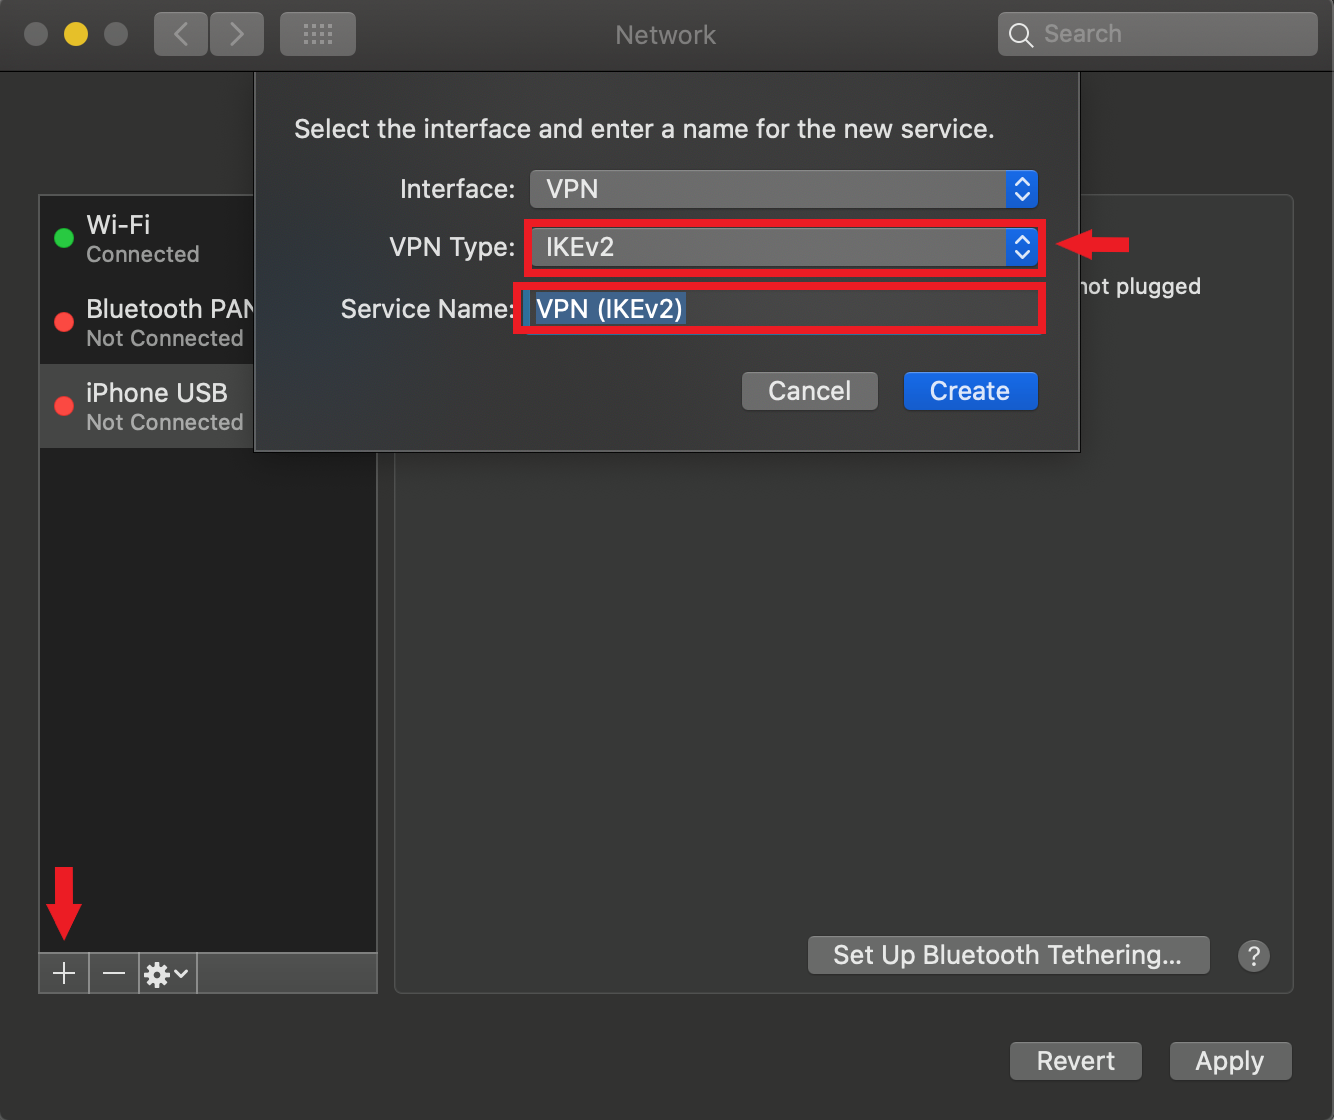
- Click Add (+) at the bottom of the network connection services list, then choose VPN from the Interface pop-up menu
- Choose the VPN connection as IKEv2 from the VPN Type pop-up menu and give the VPN service a name
- Enter the Server Address and the Remote ID which is same as the server address. (The free VPN Surf server addresses are below. When you purchase a premium VPN Surf service, you will get the premium server addresses by requesting from support.)
- uk1.vpn.surf
- de1.vpn.surf
- ca1.vpn.surf
- ny1.vpn.surf
- Click Authentication Settings

- Select the Authentication Settings: as Username and enter the user authentication information
- Tick the “Show VPN status in menu bar” to use the VPN status icon to connect to the network and switch between VPN services
- After entering the user authentication information, click OK and click Apply

- After applying simply click Connect and you will see that your VPN connection is connected. If you want to disconnect you can simply click on Disconnect.

To remove the VPN configuration, select the VPN network connection service in the list and click Delete (-).
Congratulations! Now you know how to setup a VPN connection on your MacOS. Wasn’t that hard right.
Do you value your privacy online?
Use VPN Surf and surf safely and securely in the open waters of the internet.
1673